SecureCRT is a terminal emulation program for Windows. It provides a secure connection between your computer and secure remote access and file transfer with several different terminal emulations. SecureCRT allows encrypted Secure Shell (SSH1 and SSH2) sessions with many servers and with Stanford's distributed network of UNIX computers.
Installing SecureCRT
- Download and run the SecureCRT installer file.
- When the Welcome page is displayed, click Next to continue.

- Accept the terms in the license agreement and then click Next.

- Select the profile to use for the installation and then click Next.

- Select a setup type and then click Next. (You may not see this page if you are upgrading from a previous version.)

- Check the boxes for where you want to install application icons and then click Next to continue.

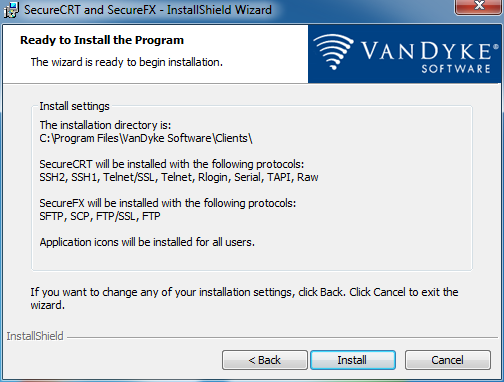
- Review your installation settings. If you want to change anything, click Back until you find the page with the settings you want to change. If you are satisfied with the installation settings, click Install.
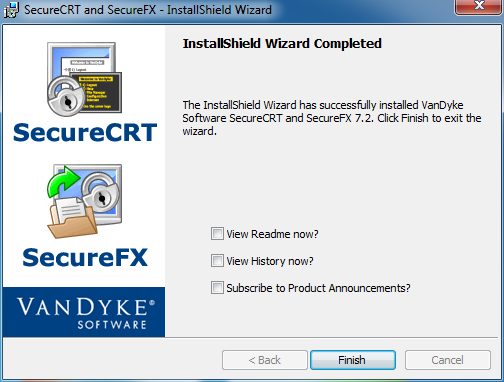
- Click Finish.
Connecting to Cardinal and Corn
The Essential Stanford Software version of SecureCRT includes pre-configured SSH2 connections to Cardinal and Corn—the most widely used IT Services-supported servers.
Note: If you use both terminal emulation and file transfer, SecureCRT and SecureFX share session settings. Configuring a connection to a particular server only needs to be done once in order for the selected server to be continuously available to both programs.
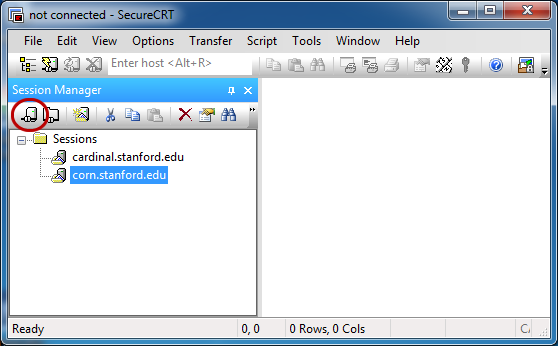
- Start SecureCRT.
- The Session Manager window should display. If not, go to the File menu and click Connect.
- Select either Cardinal or Corn and then click the Connect icon in the Session Manager toolbar.
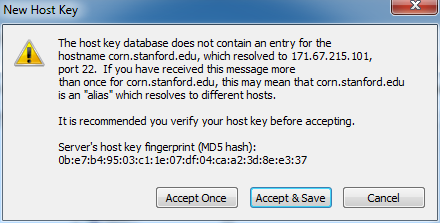
- The first time you connect to a new session, the New Host Key window may appear. Click Accept & Save.
Note: Cardinal and Corn are aliases for a number of Stanford servers. Therefore, you may see this message again when you connect to the site.
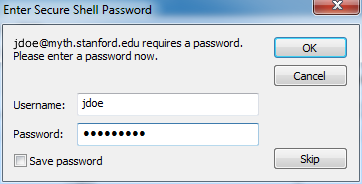
- Enter your SUNet ID in the Username field and then click OK.

- Enter your SUNet ID password in the Password field and click OK. Do not check the box to save your password.

- When you are connected to Cardinal or Corn, your workspace is a window similar to the one below.

Adding sessions
If you need to connect to computers other than Cardinal or Corn you need to create a new session.
- On the Session Manager toolbar, click the New Session icon to start the New Session wizard.

- When prompted to enter the SecureCRT protocol for the new session, select SSH2 and then click Next.
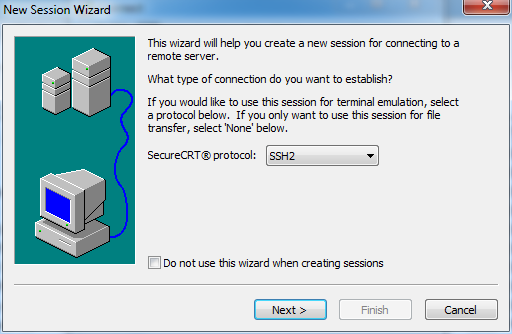
- Enter the following information and then click Next:
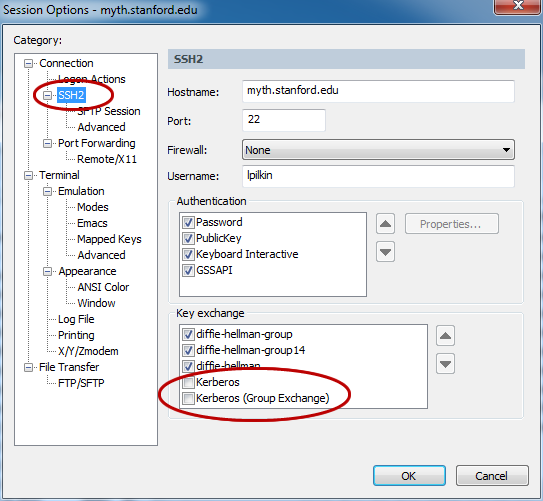
- Hostname: name or IP address of the computer you wish to connect to (use the full DNS name)
- Port: 22
- Firewall: None
- Username: your user name on this computer

- When prompted for the SecureFX protocol for the new session, select SFTP and then click Next.

- Enter a Session name and Description if you wish and then click Finish. The default session name is the host name for this session.

- Right-click on the name of the session you are adding. In the popup menu, click Properties.

- In the Category section of the window, under Connection, click SSH2. In the Key exchange section of the window, verify that the boxes for Kerberos and Kerberos (Group Exchange) are unchecked. Click OK to close the window.
- When the Session Manager window displays with the new session highlighted, click the Connect icon on the toolbar.

- The first time you connect to a new session, a New Host Key window may appear. Click Accept & Save.

- Enter your SUNet ID password in the Password field and click OK. Do not check the box to save your password.
Disconnecting
- To disconnect from a session, go to the File menu and click Disconnect.
- To exit SecureCRT, go to the File menu and click Exit.
Additional information
For additional information, go to the SecureCRT Help menu.
- Click Help Topics to access the SecureCRT online help manual.
- Click SecureCRT Web Page to go to the VanDyke Software web site, which has the latest vendor information about SecureCRT.