Get Thunderbird
You can obtain a free download of Thunderbird from the Mozilla website. Follow the instructions on the site for installing Thunderbird.
Update your current Thunderbird configuration for Office 365
If you currently have Thunderbird configured to connect to the Zimbra email server using IMAP, you can update your existing settings to connect to Office 365. After updating your server settings, you will need to re-subscribe to your folders in order to see them.
- Launch Thunderbird and enter your SUNet ID password if prompted.
- Right-click the name of your Stanford account in the left pane and click Settings.
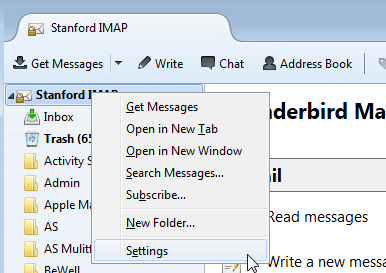
- In the Account settings window, click Server Settings and make the following changes:
- Server Name: outlook.office365.com
- User Name: your SUNet ID@stanford.edu
- Connection security: SSL/TLS
- Authentication method: Normal password
- When I delete a message: move it to the Deleted Items folder
(This setting allows you to recover deleted items. You may have to subscribe to this folder in step 7 before you can select it.)

- Click OK.
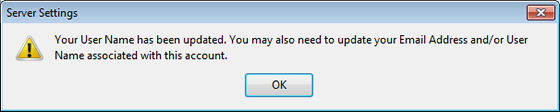
- If you see a warning saying that your name has been updated so you may need to update other fields associated with this account, click OK .
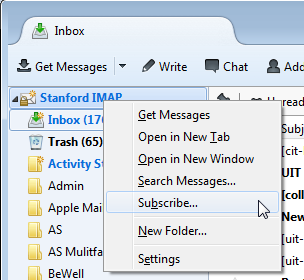
- Right-click the name of your Stanford account in the left pane and click Subscribe to subscribe to your folders on the server.
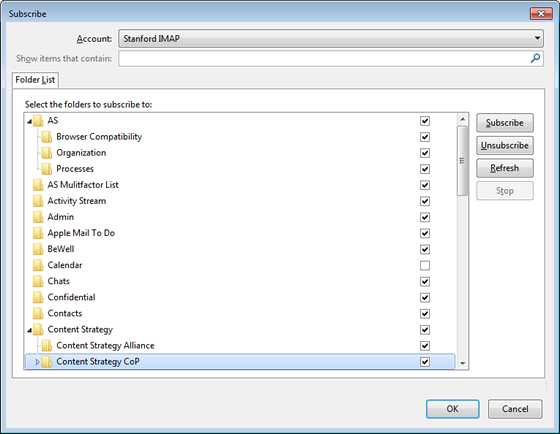
- Select the folders you want to subscribe to, click Subscribe, and then click OK.
Be sure to expand folders that have subfolders and subscribe to the subfolders.
Notes:- Do not subscribe to the Calendar folder.
- Do subscribe to the Deleted Items folder.
Set up a new Thunderbird account
After installing Thunderbird you need to configure it for use with your @stanford mailbox.
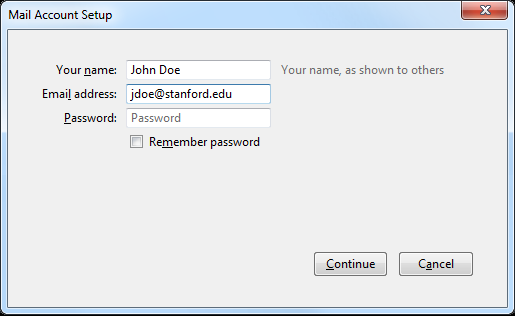
- If you've not used Thunderbird before, the Mail Account Setup Wizard should start on its own. To open it manually, go to the Tools menu and click Accounts Settings. In the left pane of the Account Settings dialog box, click Account Actions and then select Add Mail Account.
- Enter your name as you want it to appear in the From field in outgoing mail and your email address. Then, click Continue.
- Thunderbird will attempt to automatically configure your account settings. This will fail and a message saying "Thunderbird failed to find the settings for your email account" will display. Enter the following settings:
Incoming:- IMAP
- Server hostname: outlook.office365.com
- Port: 993
- SSL: SSL/TLS
- Authentication: Normal password
- Server hostname: smtp.stanford.edu
- Port: 465 or 587
- SSL: SSL/TLS
- Authentication: Normal password
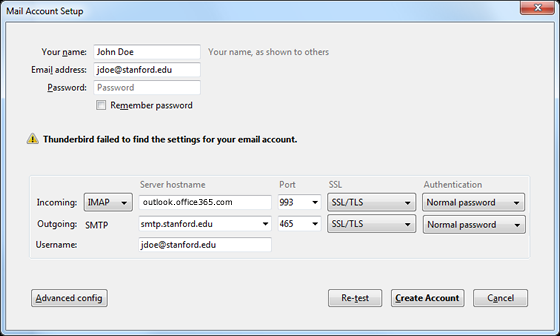
- Click Create Account.
- Click OK to close the Account Settings dialog box.
Known issues
The following are known issues with Thunderbird:
- When sending mail, Thunderbird may hang on the step "Copying Mail to Sent folder."
- You may see an error message that says, "Error copying mail to Sent folder" with a prompt to retry.
To resolve these issues:
- In Thunderbird, go to the Tools menu and click Accounts Settings.
- In the left panel, click Server Settings.
- In the Server Settings section of the window, click the Advanced button.
- Change the Maximum number of server connections to cache to 1 and then click OK.
- Click OK to close the Account Settings window.