The Stanford anti-malware service consists of System Center Endpoint Protection (SCEP), Microsoft's enterprise anti-malware solution. This program protects your computer from viruses, adware/spyware, and other malicious software.
Install SCEP anti-malware
- Download the SCEP anti-malware installer.
- Double-click the installer icon in the disk image window.
- When the Welcome window is displayed, click Continue.

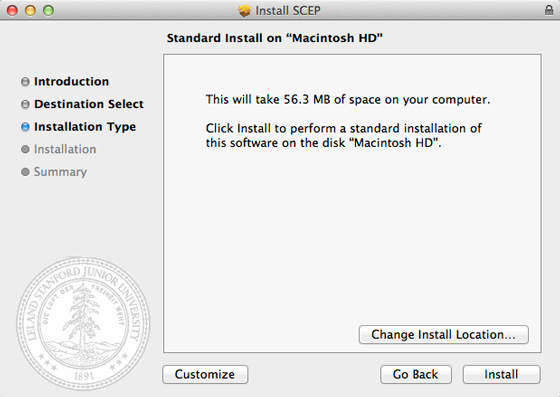
- Click Install to start the installation.
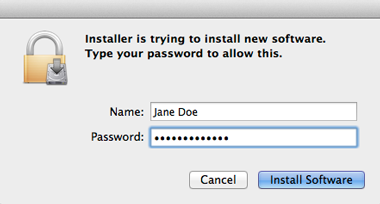
- Enter your administrator name and password for your computer and then click Install Software.
- When the software has finished installing, click Close.

- A new window providing a description of SCEP appears. Click Install.

- When the software has finished installing, click OK.

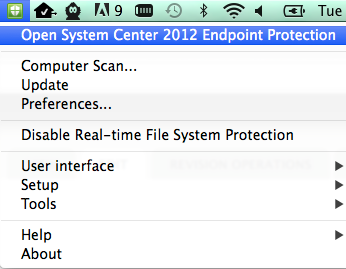
- The SCEP anti-malware icon
 appears in the upper-right corner of your screen.
Scan your computer
University IT configured SCEP to run a scan of your computer every Monday at 2 a.m. However, you may follow the instructions below to run your own immediate scan.
- Click the SCEP icon in the upper-right area of your screen and then click Open System Center 2012 Endpoint Protection.
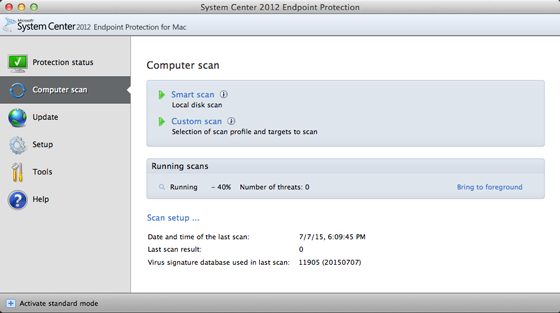
- In the Computer scan tab, click either Smart scan for a default scan, or click Custom scan to set your own parameters.
Change your scan settings
Stanford anti-malware is set to run a scheduled quick scan on your computer on Mondays at 2 a.m. University IT recommends that your computer be turned on during these scans. If you know that you will turn off your computer before leaving work, you can change the time of your daily quick scan to a time when your computer will be turned on (see instructions below).
Note: Scans can take a while.
- Click the SCEP icon in the upper-right area of your screen and then click Open System Center 2012 Endpoint Protection.
- Click the Tools tab and then click Scheduler.
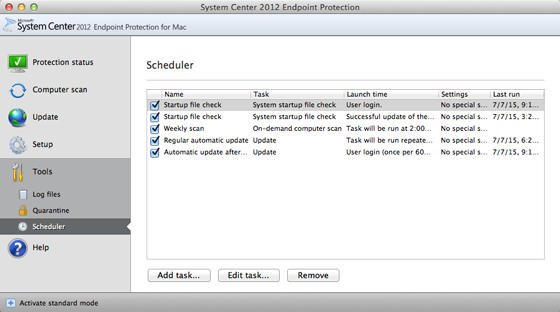
- Click Weekly scan and then click Edit task.

- Click Next until you get to the scheduling screen. You can then adjust the time and day(s) of your scan.
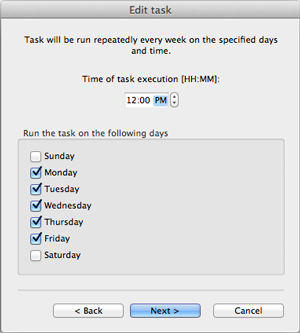
- Click Next until you reach the last screen and then click Finish.
