Student Affairs
Study List Planner
How to Use the Student Study List Planner Tool in Axess
Study List Planner is a web based class scheduling system where students choose desired courses, setup blocked times for events such as work, practice or lunch, and the Study List Planner delivers a variety of schedule grid options.
Once Axess Opens for Enrollment students can select the schedule of choice and import it directly to their Axess Student Center enrollment: add page and proceed with the course enrollment process.
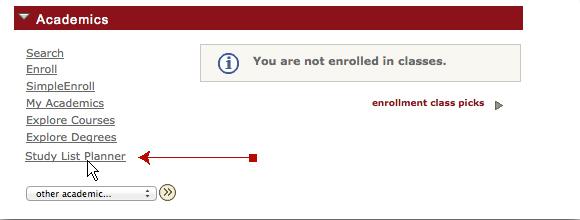
1. In Axess, click on the Study List Planner.
2. Launch the Study List Planner
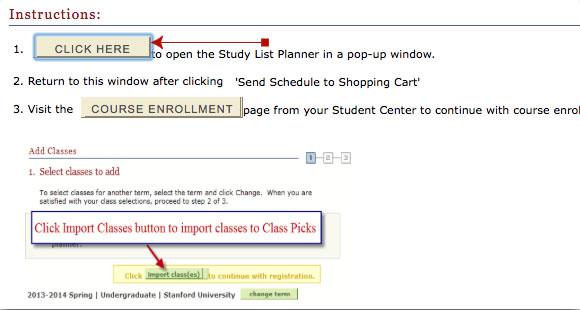
Follow the instructions to launch the Study List Planner in a separate window. Note you must turn off any popup blocker on your browser.
3. Pick Your Courses and Times
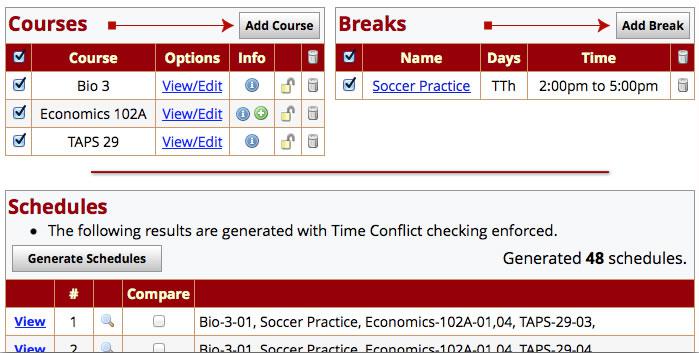
- Under the courses menu select your desired courses for the term
- Under the breaks menu, block off time periods that you are unavailable
- Select the Generate Schedules Button
- Click on the “View” link to see the each weekly schedule.
- Note: Mouse over the magnifying glass icon for a quick view.
- You may also select multiple schedules in order to compare them; click on the boxes of the schedules you want to compare, and then click the "Compare" button.
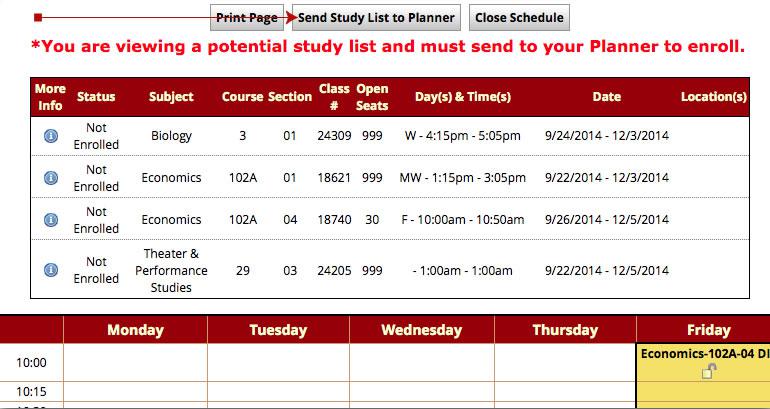
4. Send Study List to Planner
Once you find your desired schedule, click on the “Send Study List to Planner” button.
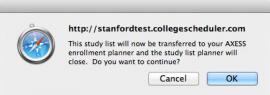
5. Click OK.
This window may appear in a different form depending upon your operating system and browser.
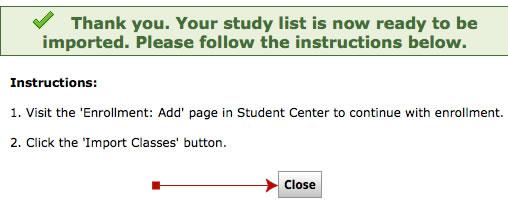
6. Return to Axess
Close the popup window to return to Axess Student Center page.
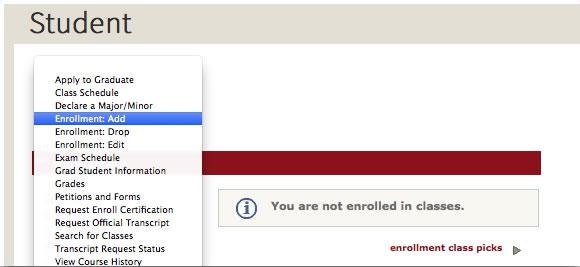
7. Return to the course enrollment page in Axess
Return to the course enrollment page in Axess by clicking on the Course Enrollment button on the Study List Planner main instruction window (you may be prompted to pick a term) ...
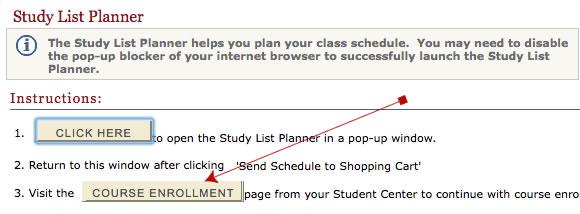
... or by returning to the Student Center in Axess and selecting “Enrollment: Add” from the academics drop down menu (you may be prompted to pick a term).
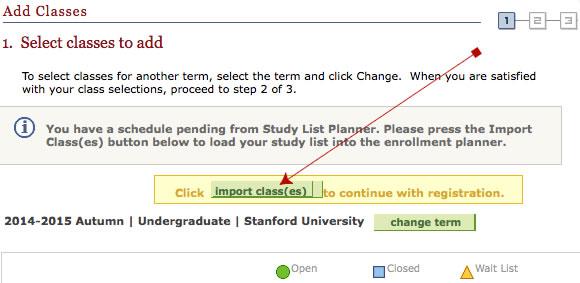
8. Add Classes
Note: you cannot perform the following steps until Axess opens for enrollment.
Click the “Import Class(es)” button on the Axess enrollment page to import all your classes from the Study List planner and proceed with enrollment.
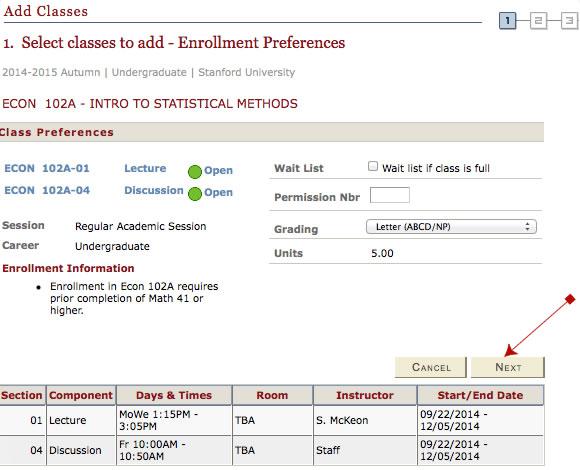
9. Enrollment Step 1
Proceed with the enrollment process, selecting the course units and grading basis as appropriate for each course, and click “Next”.
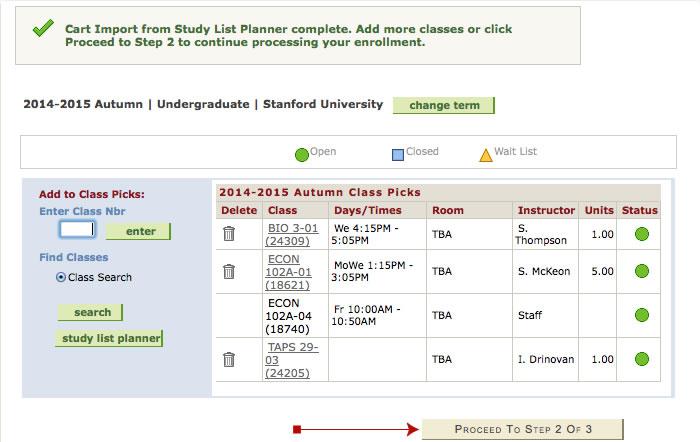
10. Enrollment Step 2
Proceed with enrollment and select the “Proceed to Step 2 of 3” button.
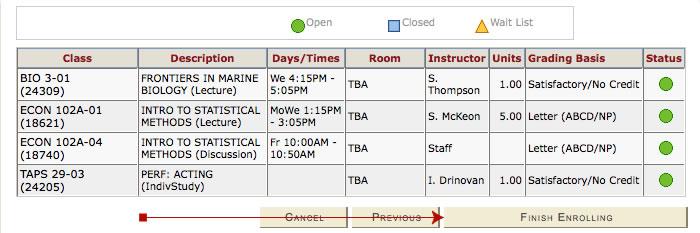
11. Enrollment Step 3
Select the “Finish Enrolling” button.
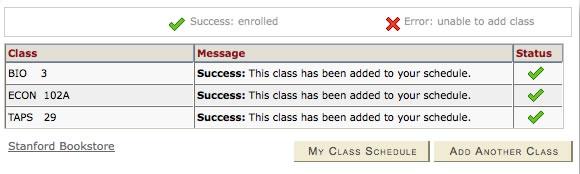
Success!
Confirm an enrollment status of success